As an Amazon Associate we earn from qualifying purchases.
 Machete sheaths are an important part for any owner of a machete. First of all, it becomes very handy when they go for outing, camping, hiking or traveling to long distance places. Secondly, the sheath keeps the owner safe from creating any damage by the machete. Besides that, it helps the machete to be in good condition for a long time by keeping it detached from the environment.
When you buy any machete, chances are you will be getting a sheath with it. It may be a good quality sheath as well as bad. If it is bad, you may want to make a new one. Also, when you are choosing machetes to make on your own, you will need to make a sheath too. There arises the question, how do you make a sheath?
Before answering the question, you need to know that, there are several ways to make any sheath. Depending on the materials, the most famous sheaths are made by:
- Leather
- PVC
- Wooden
- Kydex
Now we will be discussing how to make a leather sheath.
How to Make a Leather Machete Sheath
Among the materials of the sheath, leather is a widely used variety. For making any sheath at home with leather, you need to follow certain rules. Here we will be discussing the important parts of the process in details. The main parts of the process are:
- Designing the machete
- Cutting the pieces
- Designing on the sheath
- Putting it together
- Finishing
Designing the Sheath
The first part of making a sheath is the designing part. To do that, you have to bring out a pencil and paper first.
The Blade
Before starting the design, you have to remember that the sheath must accommodate the whole machete perfectly. So when you design the blade on the paper, you must include all parts of the machete i.e. blade, handle very accurately. Some machetes have a saw back like Gerber Gator, which needs to be considered when you are designing.
The Sheath
When the design is done, draw your sheath around the blade design. You must give adequate spaces all around the sheath. This is because when you will enter the machete into the sheath, it must accommodate the blade with ease. The entering and drawing of the machete would be easy and comfortable if enough space is there.
To begin with, a leather sheath would be a wise step for any beginners. After that, you may gear up into the wood or metal zones.
The Spacer
The sheath must have a belt loop and a pouch with it. Though, it will entirely depend on you whether you will be needing it or not. You can apply thousands of other variations as per your need.
Cutting the Pieces
Say, you are making a leather sheath for a start and later on you will be exploring other materials like Kydex or wood. The important part of this step is to implement your drawings to the leather as accurately as possible.
Transferring Drawing
At first, you need to place your leather on a cutting board. Then, place the design on the leather.
Next comes the tricky part and that is to transfer your drawings from the paper to the leather. For that, you may use some stylus or other pointy objects by which you will place the edges and corners of the drawings onto the leather part.
When you are done, you should move the paper away. Next, you need to connect all the dots and points that you have created earlier. That will give you a nice shape of a sheath in real.
Cutting
For the drawing part, you may use a pencil or other materials that you are okay with. But, a pencil is very good when you are marking on leather in general. Although the lines will be disappearing very easily then. Be very careful when you are drawing any curves as any mistakes will result in disaster!
Next thing is to cut the lines with the help of a razor blade. You need to be extra careful here not to cut your fingers! For safety purpose, you need to use gloves and pay more attention. All the parts need to be cut very precisely as there would be no turning back from here.
For making the belt loop, you need to have an extra tail-like part. Next, you will be folding it over to make a belt loop. This part will be some mirror image type that will be reflecting the shape of the loop.
Main Parts
Now, you will be making the separate panels i.e. front panel and back panel. This will be easy as the first panel helps to make the other part.
You will get the shape out of the first part into the leather and some adjustments will be made if necessary. Here, the only difference will be not to have any belt loop.
The final part will be the spacer which will be the same dimension as the front panel. This will go between the two panels. The most important aspect of this part is that it will have less spacing in the inner portion. All the three parts will be attached for having a complete sheath.
Designing On the Sheath
You can escape this part if you aren’t into it. But, if you want to, I think it may help you a bit.
Some will refer the designing on the sheath as tooling which is pretty common. I will rather keep it informal here.
So, if you are one of those people who love to give a design on your sheath, you will be loving it then. There are many pros out there who can put some awesome designs on the sheaths.
You can have anything you want on your sheath. Here I will be describing the process of it. The design will depend on you!
So all you have now is the three basic parts that you have cut earlier. Your front panel looks pretty awesome to you right now, isn’t it? But it can be even better, dude! You may give some awesome design on it or simply just your name or even the brand you are promoting.
Step 1
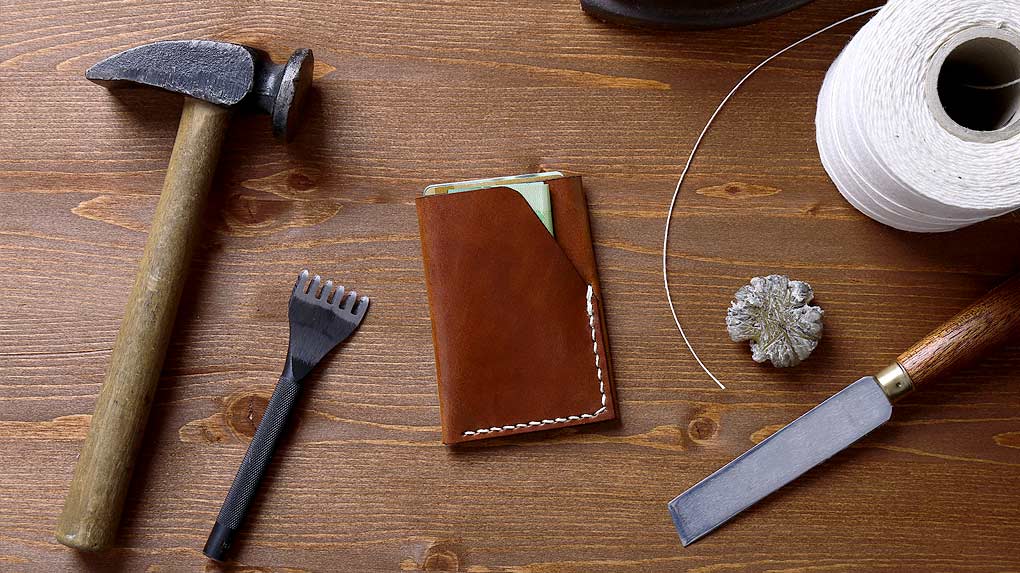
For this step, you will need a surface which is hard. Any stone surface, wood surface or even glass surface will be good for that. Don’t use any surface which is sensitive to pressure. Next, you will need some pencils and obviously the tooling kit!
Step 2
Next, you need to make the design onto the leather by a pencil. Be careful not to make any mistake. If you do, just rub that part and correct it immediately. Make sure there are no error marks left on it. Then apply the toolkit onto the pencil mark to give the ultimate design.
To make the mark onto it deeper, press the toolkit harder while not moving it. For medium impressions, move the kit along with the surface and apply some downward pressure. In this system, you will be able to draw any line or figure. Be creative here and try to enjoy!
Putting it Together
For this step, you will need some good adhesives. Also, you can use a leather sewing thread instead of adhesives. Why not use both for better performances? You know what? That will be a good idea! For adhesive, the contact cement is a pretty strong one for any leather sheath. And, for sewing the leather you will need a needle also.
For adhesive, my go to one is the contact cement. First, you need to spread it around the border of the sheath parts that need to be glued. Then you need to wait for around fifteen minutes. By that time the glues will be strong enough and ready to be pressed together.
The best thing about contact cement is that it adheres readily and gives a flexible and strong bond. Some important notes here are not to leave the glued part for a long time and not to glue on the wrong sides of the leather.
For joining the parts you also can use bolts or screws as they are widely used for making any sheath.
Finishing
So now you have your sheath ready to use. Although some finishing touches would be good to give. At first, you need to clean up the border of the edges if any extra part is remaining there. You may fill the design with some color of your preferences. That will give it an astonishing look.
Cut the rough edges from the sheath with a razor blade. Finally, rub some good quality wax all over the sheath which will give it a good dark and shiny look.
The unpolished part of the leather will also have a well-polished look after being waxed over it. This sums up the overall process of making custom made sheaths. The last thing to do is, sharpen your machete with some good stones before keeping it within the sheath.
Usefulness of a Sheath
Machetes are a very dangerous tool if not handled cautiously. It may create huge damage to you as it has a really long and sharp blade. So, the sheath comes in handy in that situation. The most basic uses of the sheaths are:
- Helps to carry the machete long distance
- Keeps the blade safe and sharp
- Doesn’t allow forming rust on it
- Most importantly, it keeps the user safe
It would be a great idea to keep the machete in the sheath and inside a home safe when not in use to avoid any accidents, especially if you have kids in your home.
Conclusion
As we have mentioned earlier, there are some other materials by which you can make a machete sheath on your own. Though the basic principles are the same, there are some small differences because of the nature of the materials.
And, it wouldn’t be a problem getting a good quality sheath out of that. I suggest you explore and enjoy the process while you do it!
Amazon and the Amazon logo are trademarks of Amazon.com, Inc, or its affiliates.

Danny is an avid hunter and outdoorsman who just love the wilderness. He learned the surviving techniques from his predecessors and became the skilled man of today. He is a family guy who loves his family dearly. From an early age, he became very fascinated with different survival tools among which machete was one of them. This website is for sharing his knowledge and skills for those who feel a close bond with nature just like him.
It always gives a great feeling to have a custom sheath for my favorite tool. Nice article.
Indeed.
I am pretty much pleased with your good work. You put really very helpful information.